I love distressing because it is a simple yet very effective way to change, revive, and re-purpose your home decor. Distressing is a technique used to achieve that antique finish that's very on-trend right now. In today's tutorial I show you 4 easy & inexpensive ways to achieve this. Let get started!
#1 Jewelry Box
I've had this ever since I was 10 years old. Lets do something about that horrid cherry oak finish, shall we?
 |
| Before |
You will need the following materials:
Small sponge brush applicator
One sheet paper towel
Using your sponge applicator, apply 2-3 coats of Thunder Gray, allowing at least an hour drying time between each coat. Next, lightly dab your sponge into the white paint and start creating random strokes, as shown in the images below. After each stroke, wipe away the excess with a paper towel.
It should look something like this. The white is pleasing to the eye in the way that it doesn't take away from the gray.
Next, take your 150 grit sand paper & scuff away!
I toned down the harshness of the white strokes I made by sanding them down to appear softer. The gray, white, & Cherry oak peaking through adds dimension and that vintage-feel we were going for.
Put it on a stained, distressed shelf & you are done!
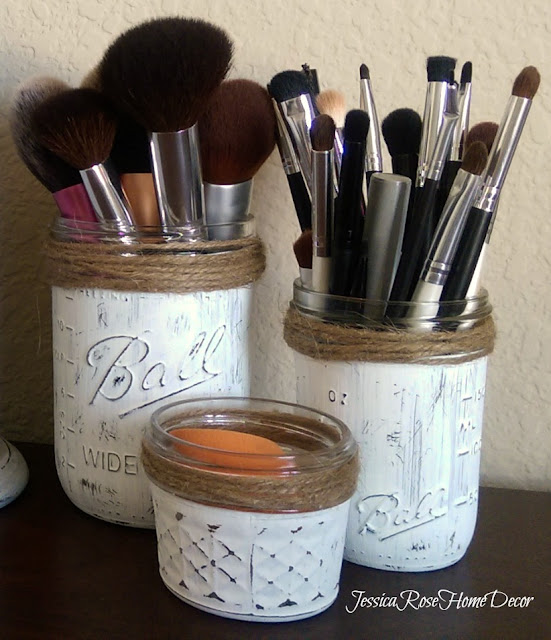
#2 Vanity Storage
How about we spice up that makeup vanity of yours?
You will need the following materials:
 |
| Small sponge brush applicator, white acrylic paint, rubbing alcohol, cotton ball, 3 mason jars - preferably different sizes |
 |
| One coat |
 |
| Two coats |
Placing it next to your antique jewelry box really ties the look together ;)
#3 Antique Mason Jar
I know what you're saying - "Didn't you just show us this with your vanity storage!" BUT!! >> this goes a step beyond the typical mason jar painting tutorials that you see everywhere on Pinterest. **This is different in the way that we layer 3 different paints to add texture, dimension, and that "antique authenticity".
Using your sponge applicator, apply the following paints in this order allowing each coat to dry (should only take about an hour):
1). 2 coats of Oyster Beige
3).
As with the technique used with painting the jewelry box, lightly dab
your sponge into the white paint and start creating random
strokes. After each stroke, wipe away the
excess with a paper towel.
When everything is dry & you have applied enough white paint strokes to your liking, begin sanding. **As you sand, you will begin to see Oyster Beige peak through Thunder Gray. This in combination with the white blended throughout is what gives it dimension (as oppose to just using one color, which makes it look flat). I find that this method is the best way to truly make something look antique.
I was looking at my shelf at the bottom of my staircase & there was something about it that was no longer pleasing to my eye - things were clashing instead of complimenting each other. Here's a before pic:
The silver bucket & birdcage took away from the light I was trying to bring into the room. If you find that something is off with the color of your decor - paint it! It's the easiest & cheapest solution. I liked the birdcage & didn't want to paint it. So I moved it to my bedroom where more brown/beige hues fit the primary color scheme of the room. I replaced it with this:
Apply Oyster Beige, Thunder Gray, with hints of White in exactly the same way described in the Antique Mason Jar tutorial above. Then distress with sandpaper.
Next is the bucket. If you are interested in how I arranged the foliage & flowers, you can find that in my previous tutorial here >> http://jessicarosehomedecor.blogspot.com/2015/04/easy-cheap-cottage-inspired-diy-lilac-flower-pot.html

For this, all you need to do is apply two coats of your white paint, distress, replace your lilacs with babies breath, and done!
Soft & Bright
I hope you guys liked all 4 of these tutorials! Please leave your questions, comments, and your antique DIY's below! :)


