Search This Blog

Showing posts with label painting. Show all posts

Sunday, March 13, 2016

Spring Decorating on a Budget!


I can't believe Spring is just around the corner! For weeks I've been working on creating DIY projects with you guys in mind. Per my usual style, I was determined to do this in the most affordable way possible without it coming across as cheap-looking.  I was able to decorate 6 areas of my home and, in total, everything cost me no more than $30 + only 2 trips to Michael's & Hobby Lobby!

You will need the following materials:
(Everything shown below was 40-50% off, ranging from $0.74-$3.59. I was able to use each piece for every project listed)


Mantel
Easy DIY Floating Mantel UNDER $20!!
Simply fill vases of differing heights and shapes with different colored flowers, greenery, and succulents. Pick colors and textures that contrast yet compliment one another.
DIY Refurbishing Antique Glass Bottles
I also intertwined vines along the top of the picket fence.
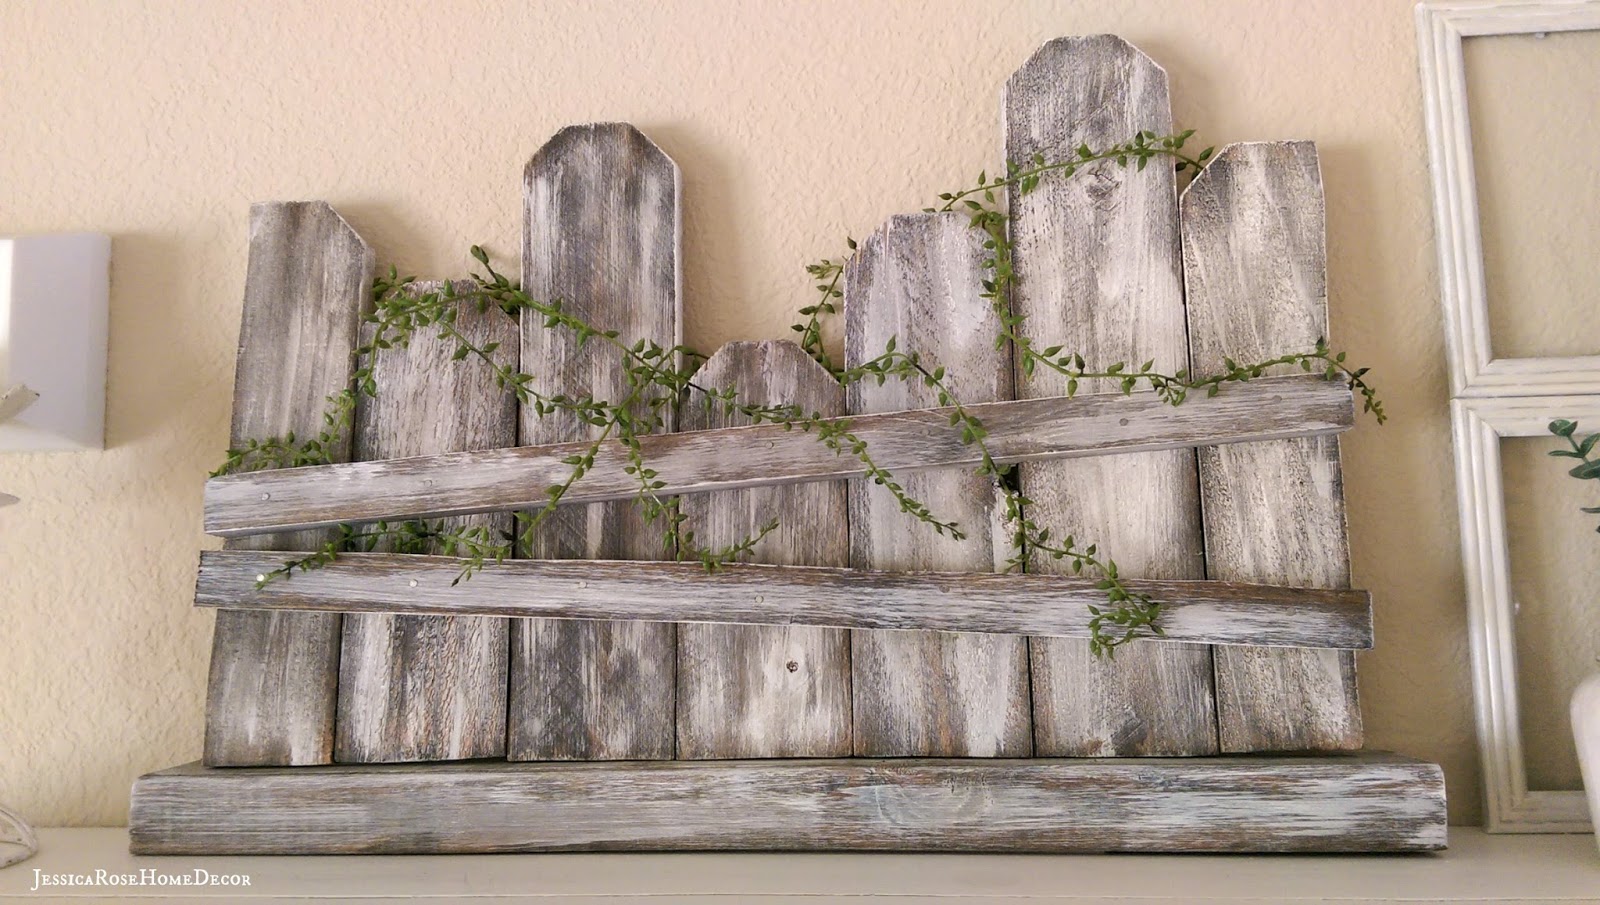
DIY Weathered Picket Fence

Kitchen Bar
For the center of my kitchen bar, I created this DIY Spring Flower Box, which I've dedicated an entire tutorial to linked HERE. I will also link my tutorial on how I made my flower trough for **ONLY $2** if you're interested HERE.  I incorporated cascading vines, a mixture of wild flowers, and succulent-looking leaves.

For the end of the bar, I filled my vase with lavender, and placed succulents & white buds in a glass bulb.

Kitchen Counter
I went very simple using white flowers with pops of light green, and another glass bulb filled with that same hue of light green succulents & white buds
I complimented the arrangement with cooking wine (also light green) and my wood pepper grinder.

Stovetop
Succulents on succulents :)

Kitchen Island
I used these two leftover pieces to fill my antique measuring tin.


Bedroom (or Bathroom) Shelf
How To: *Rustic Window* Using Dollar Store Picture Frames!
I used (some of) these pieces to fill the mason jar and mini-water jug.

I was able to decorate 6 AREAS of my home for only $30!! That's a DIY Crafting win in my book :)


Wednesday, July 22, 2015

Refurbishing Antique Glass Bottles

I've always wanted to incorporate antique glass bottles into my home decor. Their various styles, shapes, and sizes just can't be found in the glassware section at your typical department store. I wanted that authentic wear-and-tear to add character to the mantel I was designing, not to mention antique shopping is basically Heaven on Earth!! So I ventured out to my local flea market to make that happen ;)

Find old,weathered glass bottles of various heights, sizes, and shapes. Remember - slight cracks, dents, rust spots, and scuffs are a good thing!! This will ensure texture & dimension to the setup. I found all of mine at an epic antique store in town. Each bottle was a steal at $1-$2 dollars.

 I used 2 methods to refurbish these antique bottles:

#1 Accentuating Its Flaws
Some of the bottles had a natural weathered-look that I didn't want to paint over. Remember those slight cracks, dents rust spots, & scuffs we mentioned earlier? I found that I could emphasize them by painting just the inside of the bottle! Simply squeeze dollop of acrylic paint inside the bottle and swirl it around, making sure to coat it completely. Because these are antique items having gone through wear & tear over many years, this method allows that uniqueness & character to come to the forefront without covering it up with paint.


#2 Painting Layers of Colors + Distressing
This method is exactly like the 3rd option in my blog post Distressing: How-to Make Anything Look Antique (link here), but instead of layering 3 similar colors on the outside of the glass, here I applied the first color to the inside of the bottle, then added the second and/or third colors to the outside of the bottle. I finished with sanding.

3 layers of colors (one inside, two outside) + sanding


Inside
1st outside layer


Sporadic 2nd layer


2 layers of colors (one inside, one outside) + sanding


Inside Coat
Sporadic Outside Coat
If I had chosen just one re-purposing style - either method #1, method #2, or leaving them be - it would've fallen flat to the eye because they would've been too uniform. Since they are antique and each unique in character, I wanted each bottle to stand out, yet compliment each other. Using different methods accomplished this- the different finishes & textures allowed each bottle to juxtapose one another.


Tutorial on the Rustic Glass Window shown above using Dollar Store Picture Frames HERE!

Wednesday, July 15, 2015

How To: *Rustic Window* Using Dollar Store Picture Frames!

I was shopping at my local antique flea markets last week and I kept stumbling across old windows. I loved how they looked. Thoughts of serenity in my dream cottage away from it all kept coming to mind. I felt a timeless comfort whenever I looked at one. I knew I had to have one, but they were so pricey!  I couldn't justify spending that much. Not to mention they were so incredibly heavy - talk about a fear of a "you break it, you buy it!" situation. In today's tutorial I present to you my cost-effective solution to the aforementioned home decor dilemma...And did I mention I found all my materials at the Dollar Store??! $60-200 dollars for the original OR $4 for something that looks just as good? I'll let you be the judge ;)

You will need the following materials:
4 - 5x7 picture frames from the Dollar Store
duck tape
super glue
white acrylic paint
sponge brush
light grit sandpaper
 
Take your frames & discard the backings. You can also place the glass frames off to the side.
Connect your frames together on the back with duck tape. Make sure the tape is not visible from the front. (**I did three across here because initially I thought I was going to do a 3x2 window. I later changed my mind and did a 2x2 window instead.)
Flip over and apply super glue to the places you applied duck tape, as shown.

Now time to paint it. When the superglue has completely dried, apply 1-2 coats of white acrylic paint. Distress with sandpaper for more of a tattered, worn look.
Return the glass pieces back to each frame and VoilĂ ! - you now have your makeshift rustic window!
I placed mine behind these refinished, antique glass bottles I found at a flea market. As you can see, the window adds depth & dimension to the glass bottles.
vs.
What I love about this tutorial is that you can customize it to whatever your vision is - bigger, smaller, taller, different paint finishes/colors - and it won't break the bank! :)