Search This Blog

Showing posts with label succulent. Show all posts

Sunday, March 13, 2016

Spring Decorating on a Budget!


I can't believe Spring is just around the corner! For weeks I've been working on creating DIY projects with you guys in mind. Per my usual style, I was determined to do this in the most affordable way possible without it coming across as cheap-looking.  I was able to decorate 6 areas of my home and, in total, everything cost me no more than $30 + only 2 trips to Michael's & Hobby Lobby!

You will need the following materials:
(Everything shown below was 40-50% off, ranging from $0.74-$3.59. I was able to use each piece for every project listed)


Mantel
Easy DIY Floating Mantel UNDER $20!!
Simply fill vases of differing heights and shapes with different colored flowers, greenery, and succulents. Pick colors and textures that contrast yet compliment one another.
DIY Refurbishing Antique Glass Bottles
I also intertwined vines along the top of the picket fence.
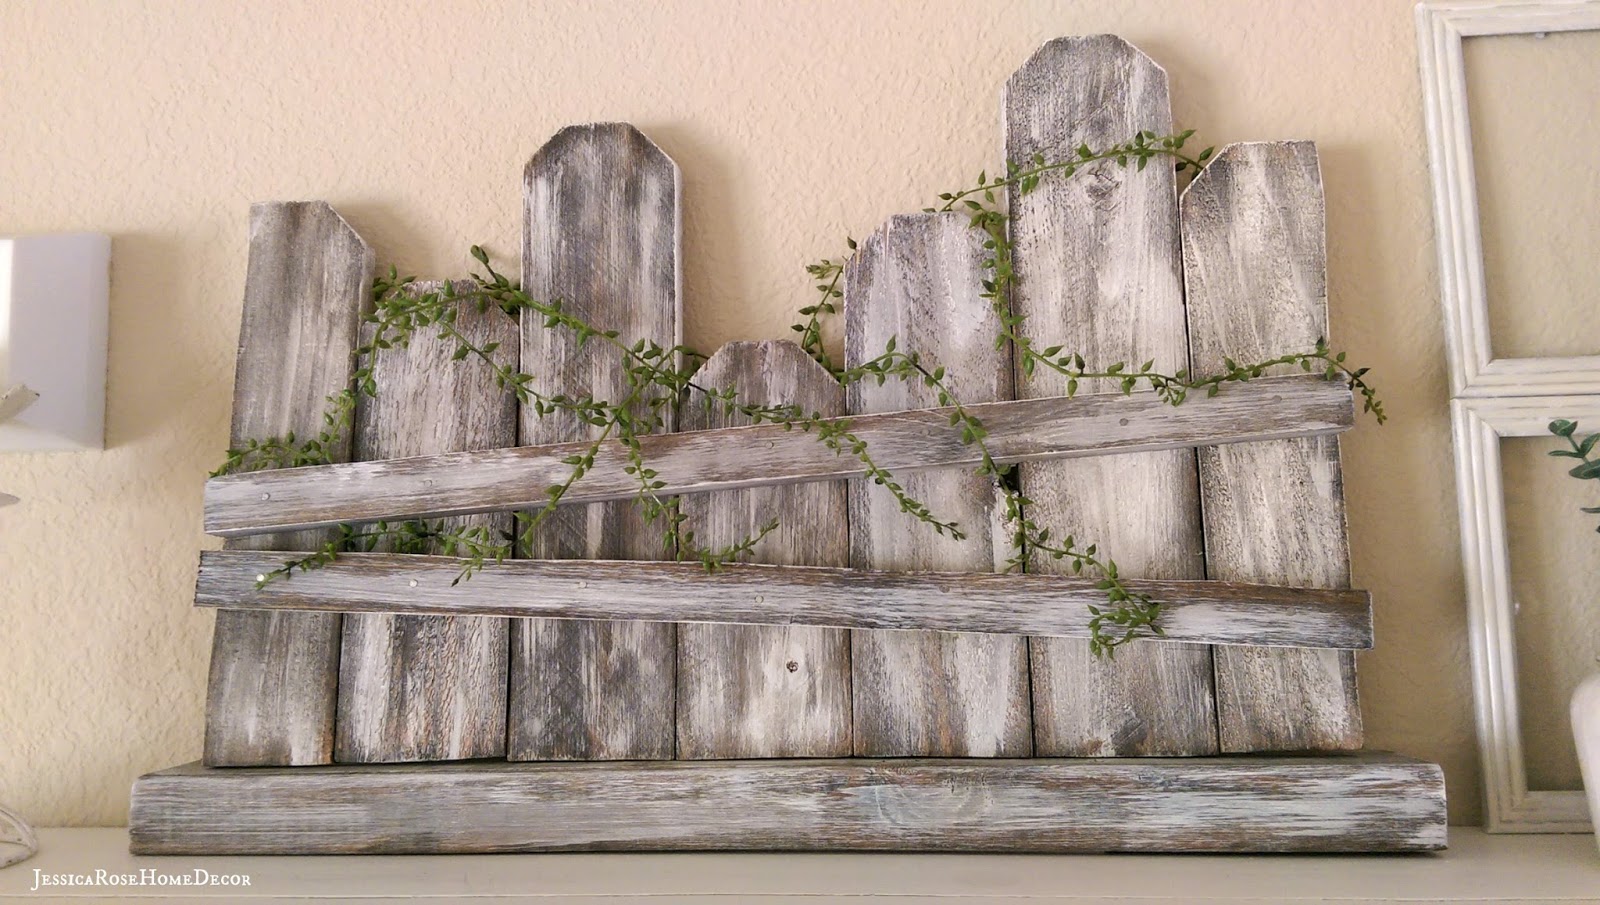
DIY Weathered Picket Fence

Kitchen Bar
For the center of my kitchen bar, I created this DIY Spring Flower Box, which I've dedicated an entire tutorial to linked HERE. I will also link my tutorial on how I made my flower trough for **ONLY $2** if you're interested HERE.  I incorporated cascading vines, a mixture of wild flowers, and succulent-looking leaves.

For the end of the bar, I filled my vase with lavender, and placed succulents & white buds in a glass bulb.

Kitchen Counter
I went very simple using white flowers with pops of light green, and another glass bulb filled with that same hue of light green succulents & white buds
I complimented the arrangement with cooking wine (also light green) and my wood pepper grinder.

Stovetop
Succulents on succulents :)

Kitchen Island
I used these two leftover pieces to fill my antique measuring tin.


Bedroom (or Bathroom) Shelf
How To: *Rustic Window* Using Dollar Store Picture Frames!
I used (some of) these pieces to fill the mason jar and mini-water jug.

I was able to decorate 6 AREAS of my home for only $30!! That's a DIY Crafting win in my book :)


Wednesday, May 27, 2015

DIY Garden Series: Repurposed Pallet in 6 EASY STEPS!

Last summer I acquired 3 pallets from a pave-stone order & have been dying to use them in my garden. There's definitely a hype around recycling old wood pallets at the moment. You've all seen them - the numerous Pinterest tutorials on how to go about re-purposing a pallet into many, many things. So for the past year I have been Pinterest-pinning like crazy anything pallet-related. However, none of the tutorials were very helpful. I found that my pallet was different from most, specifically the way the back was structured - to hold heavy duty things. If you find that you also do not have an ordinary, standard-built pallet as portrayed in most other tutorials, I hope this tutorial helps you :) This is also perfect for utilizing the most amount of space in a small backyard!

I plan on using the first pallet as a herb garden, the second for cascading vines, & the third for succulents. I will post updated photos when growth actually occurs, but I didn't want to wait till then to get this tutorial up knowing my green-thumb gardeners will be seeking out this tutorial right about now! So without further ado, lets jump right in!

You will need the following materials:
Safety goggles - wear throughout the entire project!!!
Gloves - wear throughout the entire project!!!
Hand saw - use caution!!!
Hammer - use caution!!!
3-1x5 Cedar Planks (Cedar is moderately rot-resistant & very inexpensive)
Nails:

Step One: Using a hammer, remove every other panel.
 
Front - Before
Front - After


 Step Two: Remove the 2nd and 4th panels. Also remove the middle beams using a saw.
Back - Before

Back - After
Step Three: Take the panels that you discarded in the previous step and place as shown in the 2 images below. If you could not salvage any panels, using a 1x5 cedar plank & trimming it to fit the corresponding area will work just as well.
Step Four: Now for the bases. Since I ran out of scrap wood, I trimmed & used 3-1x5 cedar planks to act as the base for each row.
Secure each base to the pallet by driving a nail through each side, as shown:
Can you see the nail-head? :)

Step Five: There will inevitably be some gaps within each row of the pallet. Since you don't want any soil to fall through, stuff these gaps with plant liner. Tiny gapes are find & don't need to be stuffed since there does need to be some drainage. You can use landscaping fabric, but I find that plant liner looks the most natural & earthy.


Step Six: Choose your herbs, fill each row with potting soil, sow your seeds, and the waiting game begins!

Link me to pictures of any pallets you've repurposed & comment below telling me if you found this tutorial useful :) Happy gardening!

Friday, March 20, 2015

3 DIY Tutorials for the First Day of Spring!

It's finally the first day of Spring! I feel like I've been waiting for this day since the first day of Winter ;) It is during Spring that I love crafting, and I'm sure I'm not the only one. So to encourage the scratch to that impending DIY crafting itch for all fellow crafting enthusiasts, I wanted to remind you that I have 3 new Spring tutorials on my blog! Please share with your family & friends, and please send me any of your recreations! 

To those few individuals who have reached out & shown your support - whether it's a 'like', re-share, +1, or a comment - it truly encourages me & lifts me up. I have felt more support from strangers in different parts of the world than anyone else & I just want to say how thankful I am :) This venture is a big, surprising endeavor for me & I hope to see it grow more and more. After years of feeling lost and so unhappy, God has finally guided me to a point in my life where I am starting to do things solely based on how much joy it brings me - It is a blessing & something I never take for granted. Okay, enough with the emotional stuff ;) Here are the links to get your Spring crafting on!


xx,
Jessica

Friday, February 6, 2015

Simple How-To Transition from Winter to Spring

With a little less than 6 weeks before Spring starts, I officially have Spring Fever. As I write this, it's a perfect 70 degrees...in the beginning of February...in Colorado. NOT normal at all, especially when an early Spring usually implies a miserable Summer, BUT for now I chose to focus on my desire to add hints of Spring in my home without being in complete denial that we are only halfway through Winter. The keyword there was hints. Add little touches of green in combination with your Winter decor. 
Faux Glass Light Bulb ($0.75) - Hobby Lobby / Babies Breath ($0.75) - Michaels
Faux Succulent ($2.40) - Michaels
Vase ($7.00) - Hobby Lobby / Winter Branches ($3.00) - Michaels
You are simply adding a touch of greenery & life to areas of your home without completely abandoning Winter - it has feelings to, ya know. Add these hints of greenery & life for a simple & clean look without overdoing it or breaking the bank. 
xx, 
Jessica